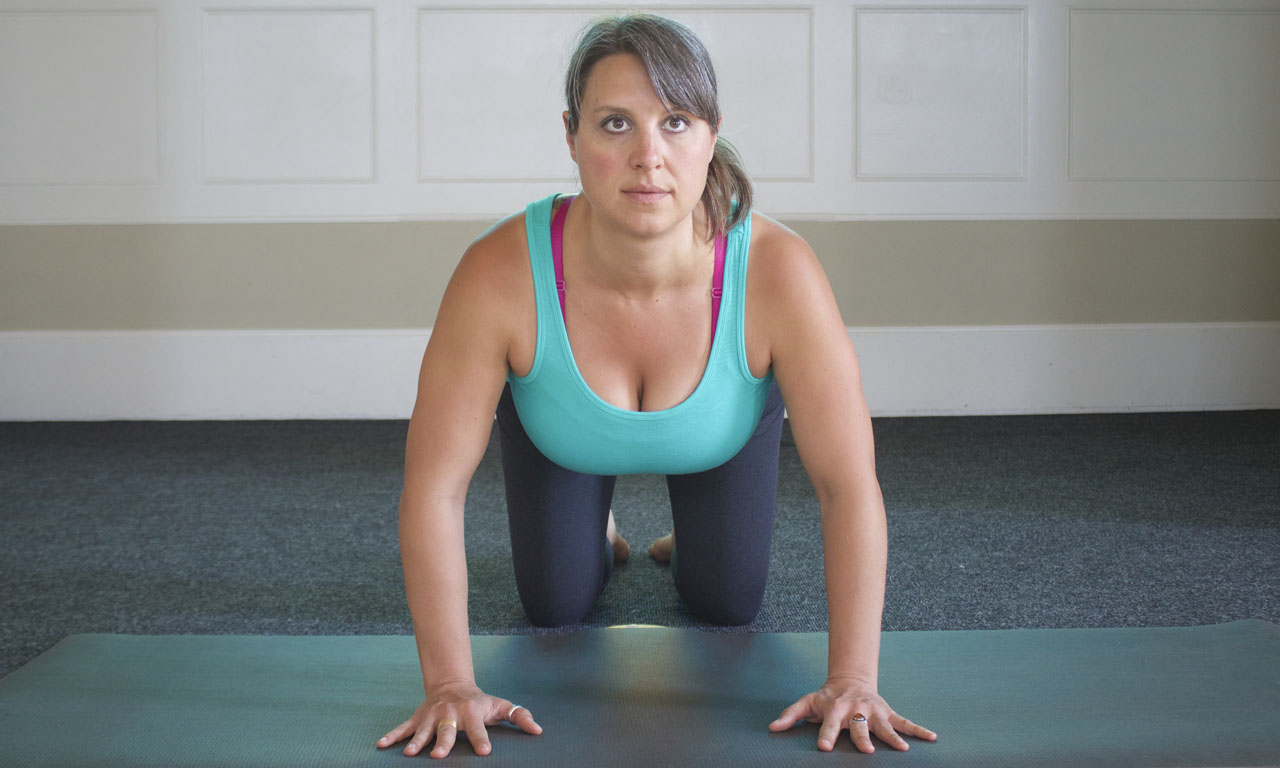
Plank Pose
Plank uses gravity in a crafty way to insist we integrate our extremities as part our core.
Plank is often treated as a minor transition pose and sometimes as a core strengthener. I, however, believe it is so much more. Not only does it use gravity in a crafty way to insist we integrate our extremities as PART OF our core, it can teach us about our subtle imbalances.
When we place our hands and feet on the mat with intention and find the true length of our body, we set up a blueprint for a number of poses that we practice on a regular basis — Downward Facing Dog, Chaturanga, Cobra, Upward Facing Dog, Lunge, and all the standing postures built on these basic forms. So really, Plank is kind of a big deal.
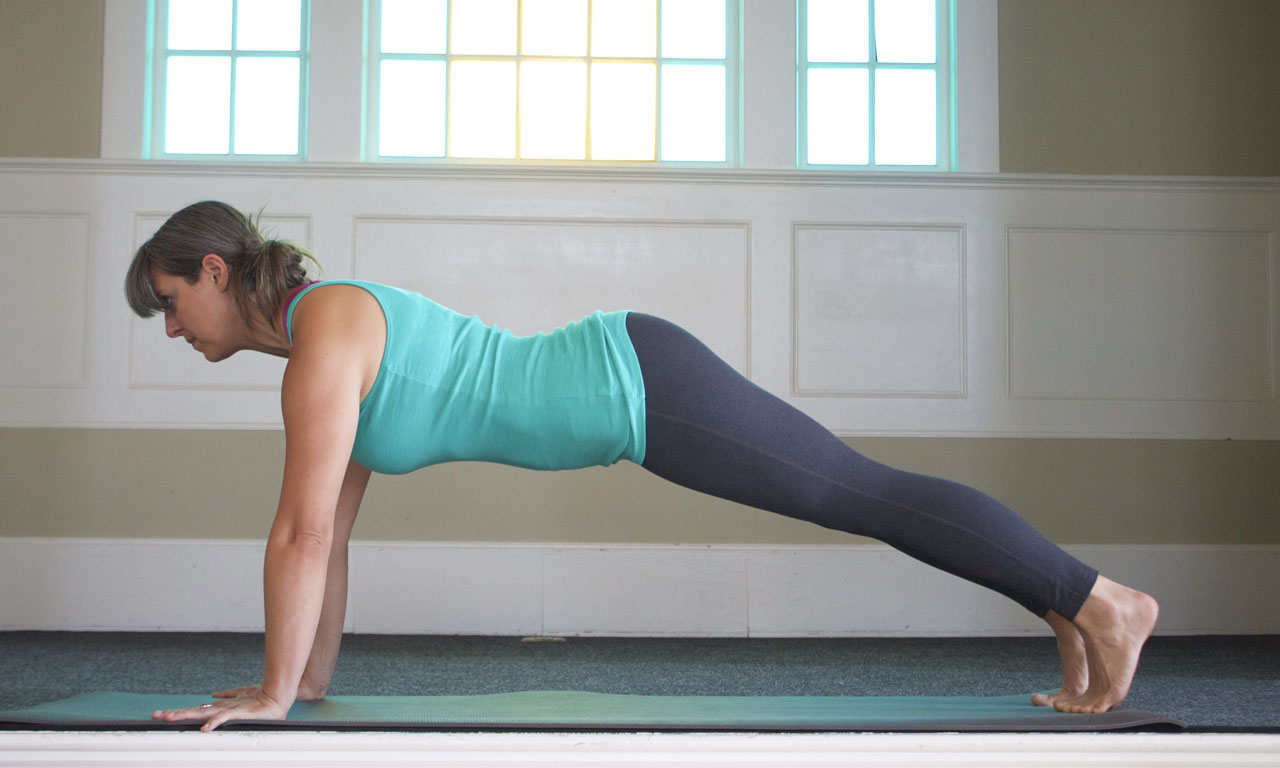
In this version, leg/belly activation is lacking resulting hips that are far too low.
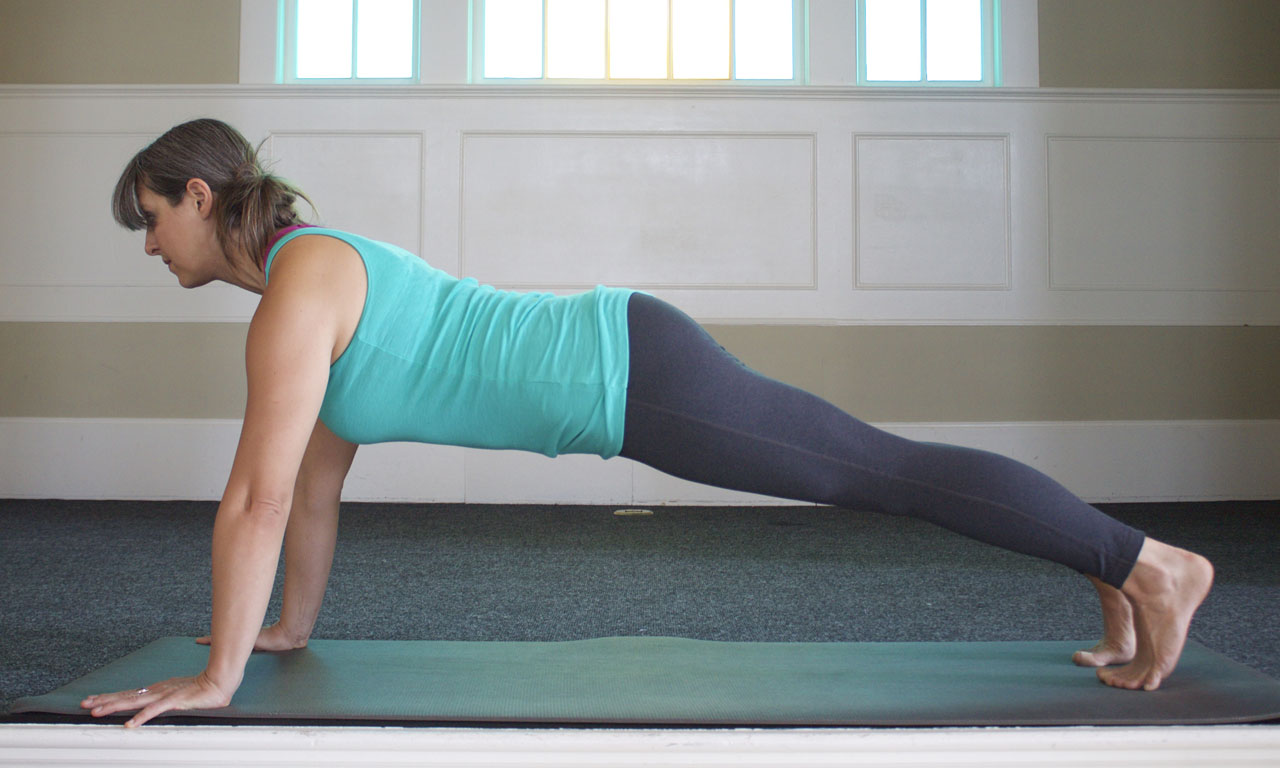
In this version the tail is tucked toward the heels and results in the core overworking and disconnecting from the work of the limbs.
We need to set it up right, with attention to detail. If our hands and/or feet aren’t positioned properly, we will over-stress small joints and damage them over time. If they aren’t properly active, we’ll lose some of our core integration and potentially injure our spinal joints. Plank is where we learn to strengthen these structures so we can support ourselves in more advanced postures. We must be mindful of intricate actions all the way from our hands to our feet in order to maintain this potentially empowering posture.
These are cues to help you build that mindfulness:
Start in Table Pose.
Comes to your hands and knees on your mat to make the shape of a table.

Note that hands are wide enough that thumbs align just outside the crease of the armpit, and that the hands are turned out to accommodate the bending of elbows straight back.
Place hands on mat wide enough that ELBOWS are truly shoulder width.
If our hands are too narrow on the mat two things happen: we over engage our chest muscles, throwing us off balance, and we risk impingement of soft tissue structures in the shoulder joint. Both of these conditions lead to injury over time. Some people also have a lateral deviation in the elbow joint that results in the forearms point out to the sides when the upper arm bones are parallel. We call it a Carrying Angle. These folks will need to take their hands wider than their elbows for all postures where the hands are on the ground. See details in the Glossary.
Note that elbows pointing out to the sides lack stability, as well as pull the knuckles away from the Earth, eliminating Hasta Bandha.
Soften elbows enough that you can point them back toward thighs.
This action equals external rotation at the shoulder. External rotation creates safe space in the shoulder joint AND helps to engage the shoulder blade into place for better weight bearing alignment. Don’t lock your elbows. Locked joints don’t use muscles for counteractive support, so the ligaments take all the forces and eventually degenerate.
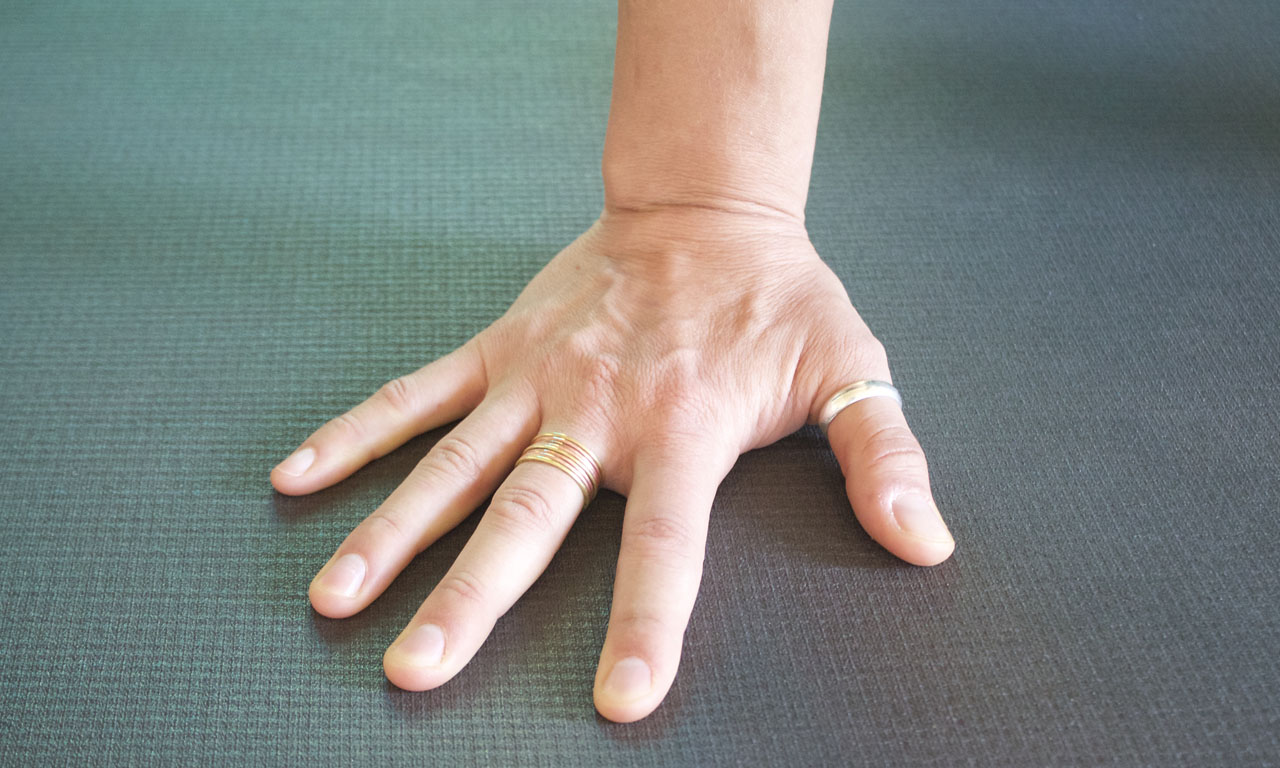
Even when bearing weight the hand should eventually look like to effort is being applied. Hasta Bandha activation makes the hand appear weightless.
If needed, rotate hands outward so that knuckles of index and middle finger can root down to mat.
If your knuckles buckle away from the mat, all of your weight will move into the wrist joints. It’s better to have the bones of the hands in both physical and energetic alignment in order to get all the power of Hasta Bandha integrated with the arm, shoulder and core. For people with a Carrying Angle, your turn out may be significant.
Keep the front plane of the shoulder just barely behind the crease in the wrist to avoid wrist hyperextension.
Hyperextension in the wrist results in impingement of soft tissues and a lack of strength in the flexors (the muscles that curl your fingers and press your hand into the ground). You cannot engage the Hasta Bandha if you cannot engage your flexors.

Note the hyperextension in the wrists. You need to shift your whole body back until the plane of the arm is behind the crease of the wrist to avoid this.
Press the knuckles and fingertips into Earth with more vigor than your wrist bones.
This reaffirms Hasta Bandha.
Triceps wrap back and in toward ribs.
This reaffirms the external rotation at the shoulder joint. It’s easy to lose this action while paying attention to other details… do this action often throughout the pose just to make sure you haven’t lost it accidentally.
Push the Earth away from you like Cat Pose.
This engages the chest muscle that help create lift out of gravity. Keep this in action as you move into the next step, you want to maintain them at the same time.
AT THE SAME TIME — Shoulder blades gently pull together toward spine to help lengthen sternum like Cow Pose.
Adducting the shoulder blades will activate the shoulder girdle muscles as a counter action to the power of the front body, creating lift AND length. It will also help strengthen the Traps and Rhomboid muscles… necessary for a safe Chaturanga!!
Tuck bottom points of shoulder blades toward armpits with serratus anterior rooting them to the ribs.
This is a very fine tuned kind of movement… frankly, not everyone will have awareness enough to engage serratus on it’s own. PRETEND you can do it. Don’t laugh. Just pretend you could pull the outer edge of your shoulder blade just a little closer to your arm bone… like you could just tuck it up under your armpit. Someday, after enough pretending your brain will realize you are serious about this and it will do it.
Lift the front ribs toward spine using a deep contraction at the solar plexus.
This keeps you from going into a backbend, keeps your organs from dragging you to the floor and adds levity to the hips and heart.
Reach one foot to back of mat, tucking toes deeply so the heel aligns over the ball of the foot.
You don’t want your heel reaching much further back than your toes or you lack engagement of Pada Bandha and the entire lower extremity.
Reach the other foot back in the same manner, finding hip-width alignment.
It’s good to get in the habit of hip width feet. It’s easier on your hip joints as you bear weight and sets up your blueprint for better balance in all poses, creating a square framework from which your spine can stay on axis.
Keep tail bone soft, do not clench glutes.
If you clench your glutes, you tend to tuck the tail. A tucked tail flattens the curve in the lumbar spine (low back).
Push back with toes and forward with hands to help integrate extremities with core.
These opposing forces work the same way as Counteraction works on a single joint, they create stability across the entire system.
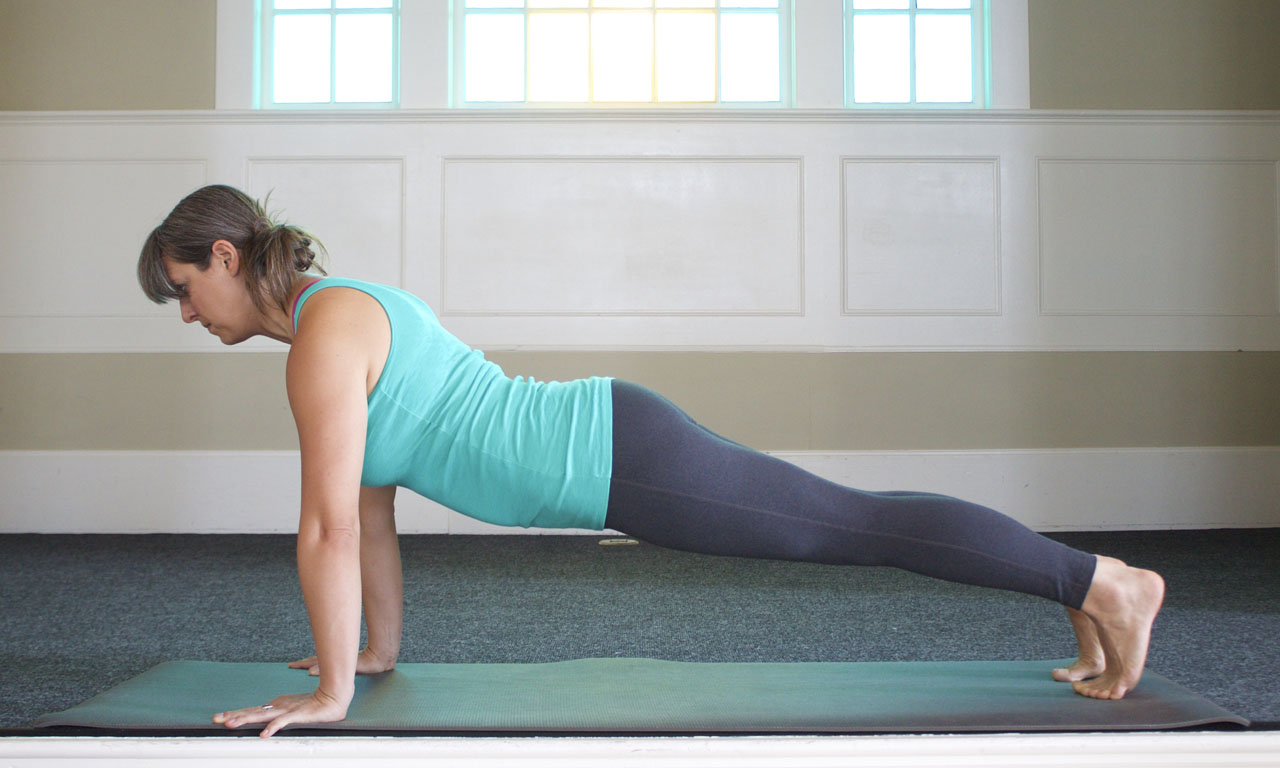
Your heels, hips and heart should be on a relatively straight line, a subtle curve in your lumbar spine.
You should always be aware of the neutral curves of the spine. Keep them engaged even when you’re not upright in gravity, it helps keep the paraspinal muscles alive and kicking regardless of your relationship to gravity.
Ribs lift and arms rotate externally to broaden chest.
Refine your posture in small ways with every breath. There are a lot of steps to even the most simple pose when your entire body is working together. It’s easy to lose one point or another, so go through the finer points mentally/physically as you maintain the pose longer and longer.
Throat lifts up to cervical spine to support the neck.
Dropping your head will place a ton of strain on the base of the neck and make your heart feel very heavy. Using the vocal cords to lift the neck will prevent you from breaking at the base of the skull and keep the back neck long.
MODIFICATION: To drop your knees for support, bend them deeply and roll forward over the toes.
Try not to draw knees forward under the hips, otherwise your pelvis takes over for the work in your mid and upper core.